How to Install Lync Server 2013 Std. Edition on Windows Server 2012
In
this post I am going to cover Basic installation of Lync 2013 in Windows server
2012.
Outline
of the Lync 2013 installation:-
- Prepare Servers
- Install Lync Server 2013
- Prepare Active Directory
- Prepare First Server
- Configure DNS
- Build Topology
- Install Lync Server System
- Add & Enable AD Users
- Login to Lync 2013
Prepare Environment
Some
prerequisites for you Lync system:
- You will need 1 AD Server
O/S and 1 Lync Server O/S
- Lync requires 64bit O/S
- This guide is Using
Windows Server 2012 64bit
- But Windows Server 2008
R2 SP1 should work fine as well.
- Make Sure you have the
below role running on your AD Server
- AD-DS (Directory
Services)
- DNS
- AD-CS (Certificate
Authority)
Prepare Your Front End Server
Install
using Windows Server 2012 “Add Roles and Features Wizard”
Server
Requirements
Front
End server must be joined to domain
FE
must have UI installed
Install
Silverlight (will save time later)
Front
End must have these Features
Roles
Web
Server (IIS)
Features
ü
Message
Queuing | Message Queuing Services
ü
Remote
Server Administration Tools | Role Administration Tools | AD DS and AD LDS
Tools
ü
User
Interfaces and Infrastructure | Desktop Experience
ü
Windows
Identity Foundation 3.5
ü
.NET
Framework 3.5 Features
ü
.NET
Framework 3.5
ü
HTTP
Activation (Important!)
ü
Non-HTTP
Activation
ü
.NET
Framework 4.5 (all options)
ü
Roles
ü
Web
Server (IIS)
ü
Role
Services
ü
Common
Http Features Installed
ü
Static
ü
Default
doc
ü
Https
errors
ü
Health
and Diagnostics
ü
Http
logging
ü
Logging
Tools
ü
Tracing
ü
Performance
ü
Static
Content Compression
ü
Dynamics
Content Compression
ü
Security
ü
Request
Filtering
ü
Client
Cert Mapping Authentication
ü
Windows
Authentication
ü
Management
Tools
ü
IIS
Mgt Console
ü
IIS
mgt Scripts and Tools
ü
Application
Development
ü
ASP.NET
3.5
ü
ASP.NET
4.5
ü
.NET
extensibility 3.5
ü
.NET
extensibility 4.5
ü
ISAPI
extensions
ü
ISAPI
Filters
Reboot
Front End and login as Domain Administrator.
Install
Lync Server 2013: -
Insert Lync 2013 Image file into CDROM and Run
Setup.exe

You will be prompted to install Visual C++ 2012
x64. Click “Yes” (screenshot below).

Accept Terms and click “Ok” to install.

When install is complete (3minute wait time) you
will have below apps on your server and the Lync Server Deployment Wizard
(below) will appear.

Lync Server Management shell.
Lync Deployment Wizard.
Prepare Active Directory
Click “Prepare Active Directory”. (As noted in
prerequisites, you will need AD DS and AD LDS Tools Feature installed on your
Front End to complete this step.)

- Step
1: Prepare Schema. (takes 1minute, and you may need to wait a couple
minutes before this and step 2)
- Step
2: Verify Replication of Schema is not necessary if this is a Lab and
there is only one AD server—you can safely keep moving to step 3.
- Step
3: Prepare Forest | Next | select Local Domain | Next (5sec)
- Step
4: just keep moving
- Step
5: Prepare Domain | Next (5sec)
- Step
6: just keep moving
- Step
7 below

Add
Lync Administrative User to Admin Group
Add the Administrator to CSAdministrator group
(shownbelow)
CSAdministrator.
Prepare
First Standard Edition Server
Now let’s go back to the Deployment Wizard and
click “Prepare first Standard Edition server”.

You will see the below “Prepare single Standard
Edition Server” wizard window and you can just click “Next”. During this
process the below will be installed:
- SQL
Server 2008 Express Edition will be installed
- RTC
databases will be created and populated
- Lync
Server installation files will be put in place
- Etc

- Configure DNS Records
Let’s open DNS Manager on AD server. Right click
on your domain (in our case Learnexchange.com) under Forward Lookup Zones,
click “Other New Records…” and scroll down to “Service Location (SRV)” and
click Create Record

We will add SRV to pointing our Front End server
(Lync.learnexchange.com)

We will
also create 3 DNS A Records. Right click, “New Host (A or AAAA)…” Add a DNS A
record for
- meet
- dialin
- admin
as shown below

Repeat this for meet and admin DNS A Records.
Now let’s go back to the Deployment Wizard and
click “Install Administrative Tools”.

Build and Publish Topology
Next we will go to Start and run “Lync Server
Topology Builder” (below).
Select New Topology (as shown below) and then give
the topology some name.

Now we will be defining this topology.
Primary SIP domain: learnexchange.com | Next

Specify additional supported domains: {nothing/none}
| Next
- Define
the First site
- Name:
Chennai Learning Center
- Description:
Chennai Learning Center.

- Specify
site details
- City
- State
- Country
Click “Finish”

Define Front End Pool
FQDN: Lync.learnexchange.com
Note: if this is a Standard Edition, this FQDN
will be exactly the same FQDN as your FE server (Lync.Learnexchange.com in our
case)
Standard Edition Server

Next we will select Features for this Front End
Pool
Check these features:
- Conferencing
- Enterprise
Voice
- Call
admin control

- Select
Collocated server roles
- collocate
Mediation Server: check

Associate server
roles with this front End pool
- Enable
an Edge pool…: unchecked

Define SQL Store
Lync.learnexchange.com\rtc

Define the file store: default, next (NOTE: You
will need to manually create this network share and give rights to everyone.
This wizard will not automatically create it for you)

Let create the Lync file store share right now so
we don’t forget. You can create this folder where ever you want it. (Preferred:
other than OS Drive C) Next go into the properties of the folder and give full
access permissions to these groups:
- RTCHS
Universal Services
- RTC
Component Universal Services
- RTC
Universal Server Admins
- RTC
Universal Config Replicator
Click on the “Sharing” tab, click on “Share

Specify the External URL ( In our case
Lync.learnexchange.com)

Specify where your Office Web App server is (In our case OWA.learnexchange.com)

Now you are finished with the wizard.

Edit properties of topology
Right click on “Lync Server 2013 and then “Edit
Properties” and update Central Management Server.
Publish Topology
Action | Publish | Next | Next

Install
Lync Server System
Deployment Wizard | Install or Update Lync Server
System

Now we will install some Lync Server System
components, put Certs in place and Start Services:
1. Step1
Install RtcLocal database
2. Step2
Install Speechfiles, etc.
3. Setup
Certs
4. Start
Lync Services

- Step1
Install Local Configuration Store (will install RtcLocal)
- Run
- Retrieve
Directly from the CMS…
- Next
- Step2
Setup Lync Server components (will install Speechfiles, etc)
- Run
|
- Next
- Step3
Request Certs (Installed ADCA authoritative)
Run, select “Default Certificate” then click
“Request”


Certificate Request: Next
Delayed or Immediate Request Send the request
immediately to an online cert authority
Choose a Certificate Authority (CA): Select a CA
from the list


Certification Authority Account: Next
Specify Alternative Certificate Template: Next
Name and Security Settings: some name

Organization Information: fill in Org and Org Unit
Geographical Information: fill in
Subject Name/Subject Alternative Names: Next
SIP Domain Setting on SAN: Select SIP Domain
(example: Learnexchange.com) | Next | Next | Finish.


Configure Additional SAN: Next
Certificate Request Summary: Next
Executing Commands: Completed: Next
Online Certificate Request Status: Finish
Certificate Assignment: Next
Certificate Assignment Summary: Next
Executing Commands: Finish
Select “Default certificate” and click Assign
certs

Now repeat the Certificate Wizard steps for the
OAuthTokenIsuer.
Step 4: Start Services
After services are started you can open the
Services to verify all the Lync Services are running.

Go to Start | Run Lync Control Panel before
Install Silver Light.

Add and Enable AD Users
Next, we will move to our AD server and add
several users to Active Directory (I suggest for your first test users to NOT
use the Administrator, but 3 other users). In our case I added:
Gengaiyan
Administrator
Now back to Lync Server Control Panel. Click on
User | Enable Users. Now click the “Add” button and Add the 3 users.

Install Lync 2013 Client and Login Using SIP
account.
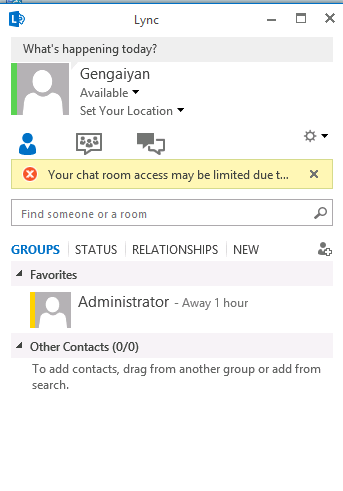
Enjoy.
Thanks
No comments:
Post a Comment